
Import your data
Bring staff, documents, vehicles, sites and clients in from a spreadsheet, check every row, and add only the rows you choose.
If your records live in a spreadsheet today, you do not need to type them again. Import data reads an Excel or CSV file into a list you can check and correct on screen. Nothing is added to ValiCrew until you choose which rows to add.
You can bring in sites, clients, employees, contractors, drivers, documents and vehicles, one sheet each, in a single file.
Admin can import everything. HR can import sites, clients, staff and documents; Operations can import sites, clients, documents and vehicles. For a custom role: places.manage for sites and clients, people.manage for employees, contractors and drivers, documents.manage for documents and vehicles.manage for vehicles. You only see the sheets you are allowed to import.
Prepare your file
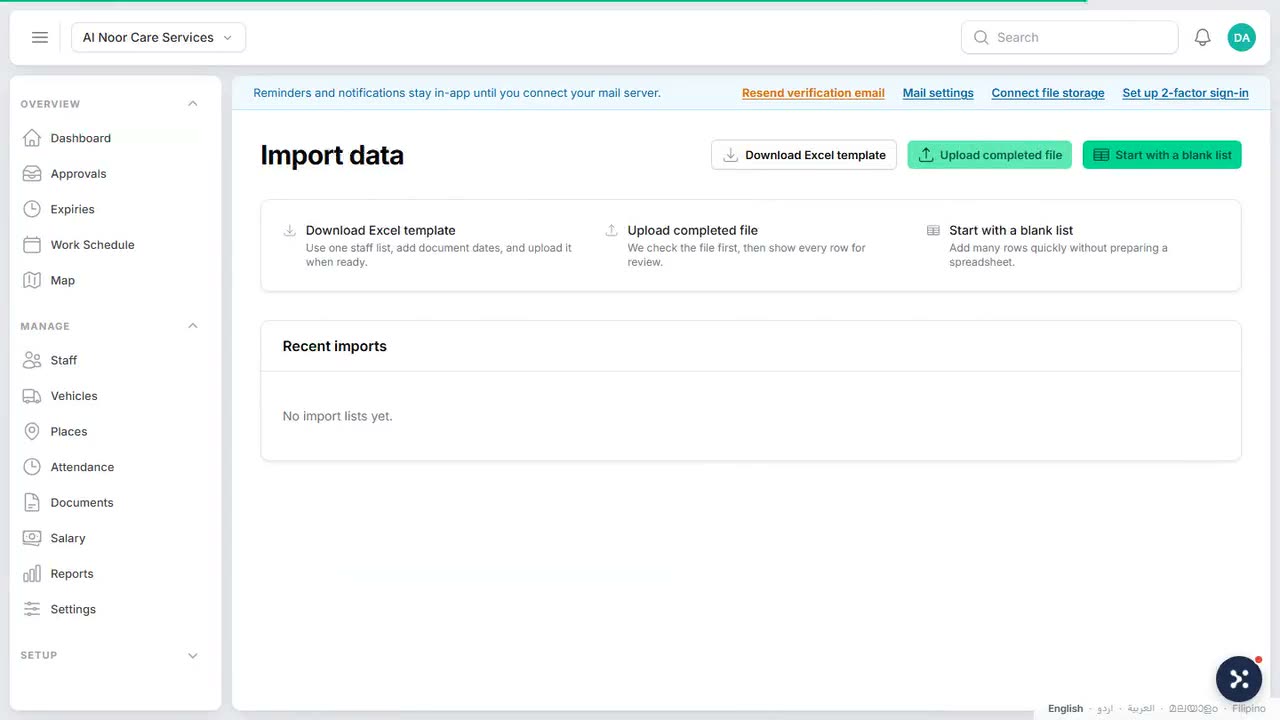
- Open the Setup group in the menu and choose Import data.
- Choose Download Excel template. It holds one sheet for each kind of record you can import.
- Fill in the sheets. Keep the column headings as they are. A heading marked * is required, and dates go in as YYYY-MM-DD, for example 2027-12-31.
Under What you can bring in, the page lists each sheet with the least a row needs:
| Sheet | A row needs at least |
|---|---|
| Sites | Site name |
| Clients | Client name |
| Staff (employees, contractors and drivers) | Full name and designation |
| Documents | Owner type, owner key, document type and expiry date |
| Vehicles | Plate number |
Put only the facts in the workbook. Scans and other document files are added later from each document record.
Already have a spreadsheet of your own? Choose Match the columns yourself, pick the file, say in What is in this file? which kind of list it is, and match each Your column heading to Where it belongs. Then choose Read the file. A ValiCrew Free Excel Tracker is recognised on its own.
Upload and check the rows
- Drop the file on Drop your completed file here, or use Choose a file. Excel (.xlsx) or CSV files up to 10 MB work; older .xls files do not.
- ValiCrew scans the file, reads it and then deletes it. Only the rows stay, for you to check.
- At the top, the counts show where every row stands. Choose a count to see just those rows.
| Count | What it means |
|---|---|
| Ready | Can be added as it is. |
| Need details | Something required is missing, such as a designation. |
| Already here | Matches a record you already have. |
| Problem | Something is wrong; the row says what. |
| Added | Already added to ValiCrew. |
Each kind of record has its own tab. Click a cell to change it; changes are kept until you finish. Fill in or Fix on a row opens its details. For documents, choose who the document Belongs to and its type in the list itself.
If the file named a designation or department your lists did not have, it is created while the file is read and named at the top of the review. Choose Check the names to fix a spelling before it spreads.
Tick rows to work on several at once: Apply to selected sets one value, such as a department, on all of them, and Edit selected opens a single ticked row. On staff tabs, Generate missing codes fills in staff codes.
Add the rows
- Choose Add on a single row, or tick rows and choose Add selected.
- The bar at the foot of the screen has a button that adds every ready row at once.
Rows are added in the background. When they are done, a notification arrives under the bell: Import completed, or Import needs attention if some could not be added.
Rows that need you stay in the list, so you can fix and add them later. A button at the top downloads them as a file, with the reason for each. A file stays open under Recent imports until you finish it; choose Continue to pick it up again. Remove selected takes rows out of the list; removing a staff row also removes its driver and document rows.
To throw a whole review away, choose More and then Delete import run. Records already added stay in ValiCrew.
Start without a file
For a handful of records, choose Start with a blank list, then Add row for each one. You check and add them the same way as rows from a file.
Rows always go into the company selected in the top bar. To import into another company, switch company first. See Add your companies.
 Watch the short filmGetting set up in one import